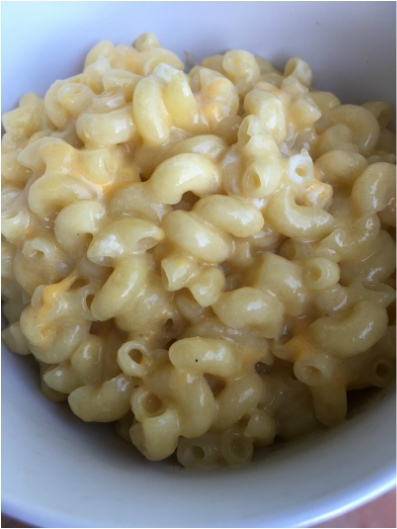
Last night my little guy couldn't sleep and so we let him stay up late watching cooking shows with us, and he said, "Oh, I want mac and cheese!" It was late and I wanted him to go to sleep, so I said, "I'll make you mac and cheese for breakfast."
This morning came, and I knew the rice cooker mac and cheese was going to save the day. And was I ever right! This is exactly the kind of easy recipes I was wanting to share when I started this blog, so here it is and I hope you love it! In under 20 minutes we had creamy mac and cheese with slightly crispy edges just like baked mac and cheese. Recipe
Method
Mix all ingredients in rice cooker and stir as well as possible. Then set rice cooker to cook and set a timer for 5 minutes. At 5 minutes, stir, and then set for another 5 minutes. At the 10 minute mark, stir again and taste (it may be sticking to the bottom a bit, just gently scrape away). If the noodles still need some time, give it another 2-3 minutes and check again. Mine took exactly 13 minutes total this morning, and it was PERFECT.
Check out some more of my recipes using the rice cooker HERE.
12 Comments
It's my birthday!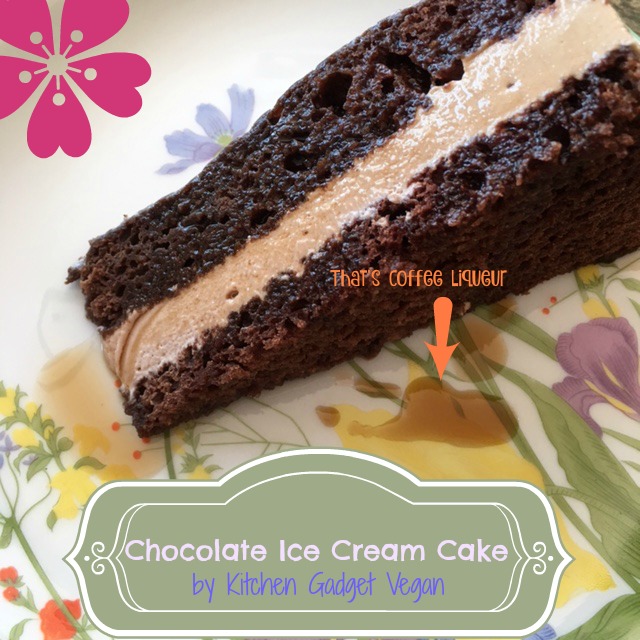
My great grandma was a firm believer that one must eat birthday cake on their birthday. While I do kick back some and my husband made breakfast (Zucchini Pancakes from You Won't Believe It's Vegan), I like to make my own birthday cake.
This year, I opted for an ice cream cake to compliment our warm spring, and a simple Whacky Cake for ease. Gadgets
Springform pan (or cake pan)
High Speed Blender (like Vitamix or Blendtec)
Ice Cream Maker (I have thisCuisinart one and love it)
Vegan Chocolate Ice Cream Cake
For the cake

This is a TWO DAY job, so there's day 1 prep and day 2.
Day 1
First, make your cake. This is a Whacky Cake, which is an age old recipe dating back since at least The Great Depression, but likely further back. It wasn't intended to be vegan, simply less expensive and easier to source the ingredients for. Preheat your oven to 350 degrees. Combine all your dry ingredients right in your cake pan. I used a springform pan, but another is fine too, Even square would work just fine. Once your dry ingredients are all mixed, make 3 little wells in the mix. Pour the vinegar in one well, the vanilla in another, and the oil in the last. Top it all with the water and combine everything completely (right there in your baking pan- happy birthday to me with this ease). Bake for 30 minutes or until a toothpick inserted in the middle comes out clean. Let cool to room temp, then store in refrigerator overnight. My refrigerator has some magical humidity control and doesn't dry things out, but if yours doesn't, then make sure to cover with sedan wrap or similar. Next, the ice cream. Put all ingredients in your high speed blender and blend until silky smooth. Then put in a sealed container and refrigerate overnight. This step *could* be skipped, but I find that having a cold base makes the ice cream maker more effective, so if you forgot this, no big deal. Make sure your ice cream making bowl is in the freezer (I just keep mine there so I am always ready to make ice cream at a moment's notice). 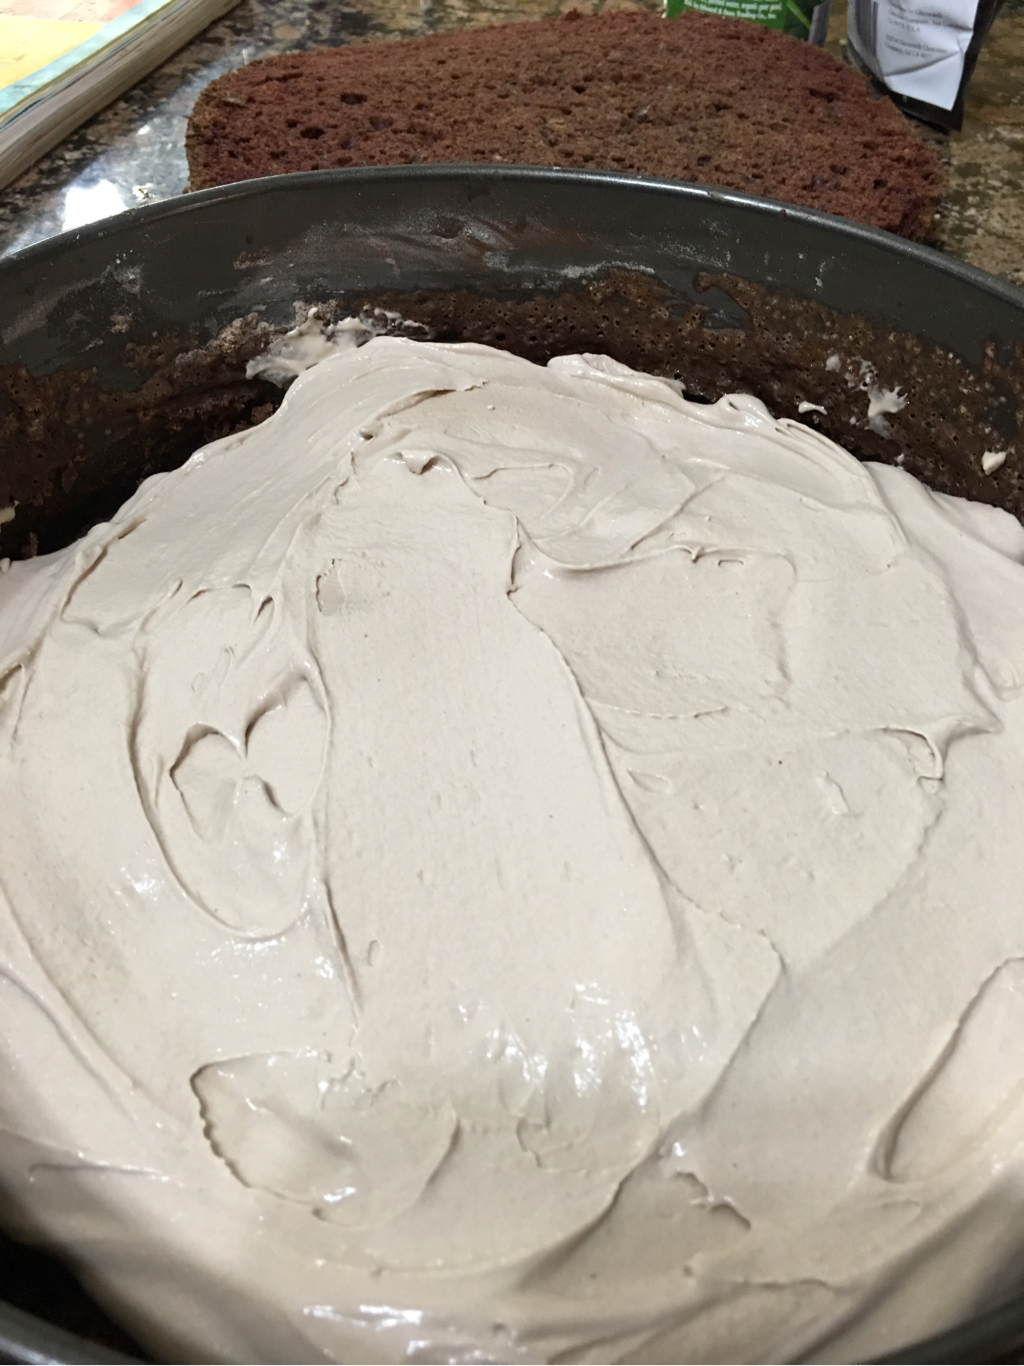
Day 2 (My birthday! Or whatever your occasion is)
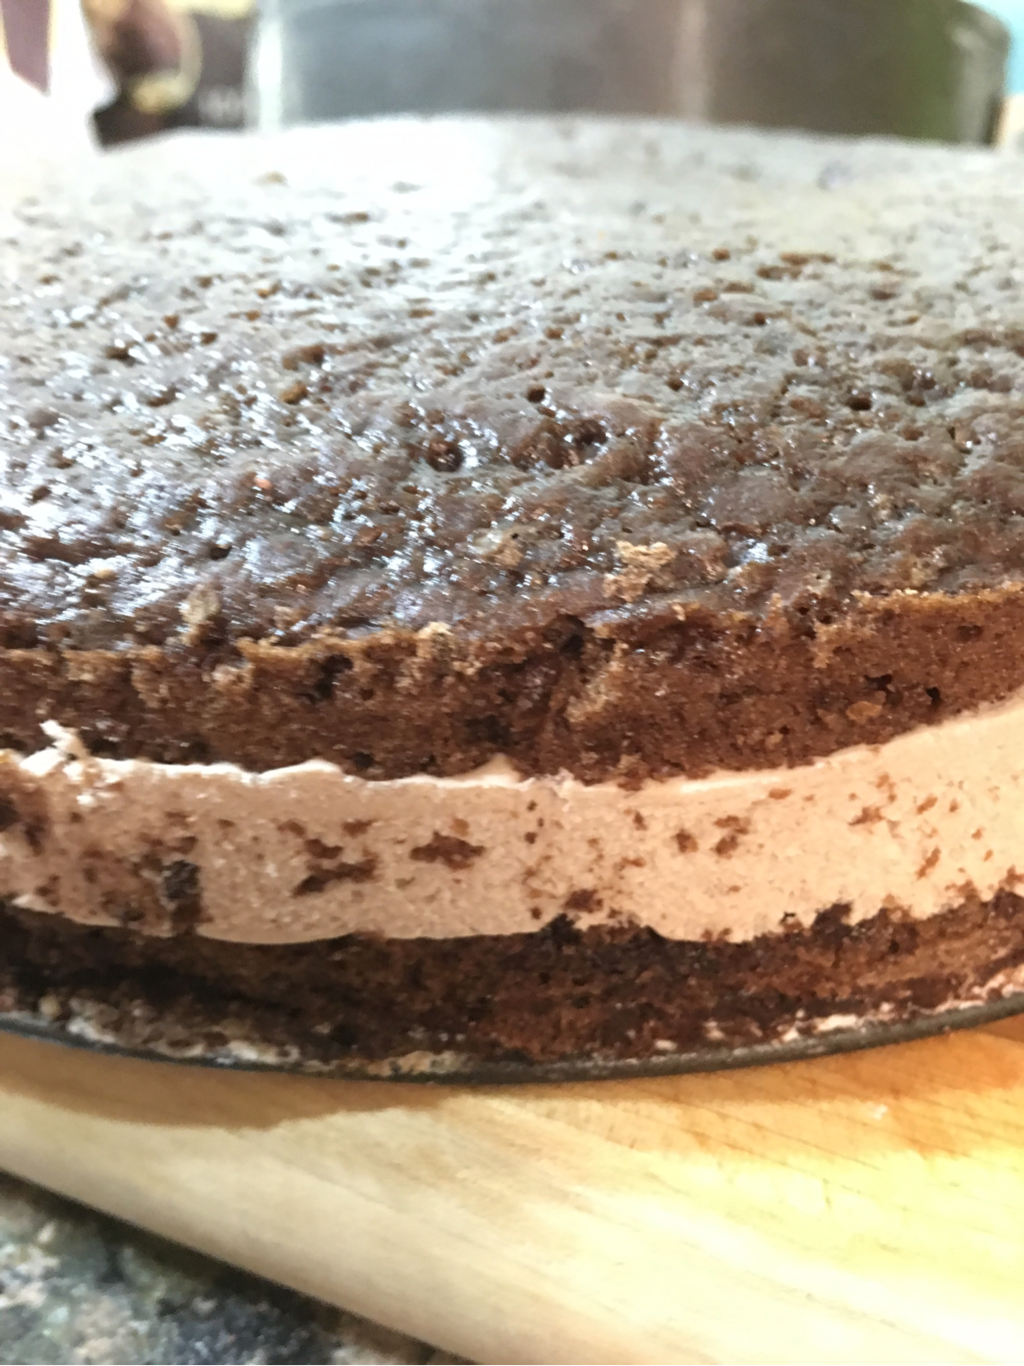
Put ice cream mix into the bowl and set it and forget it. Let it go until it's the consistency of soft serve. While that goes, slice your cake in half as best you can. I just eyeballed it and used a large bread knife, but there are special cake cutting gadgets if you are into precision. Put the cake back in the baking pan and layer bottom half, soft serve ice cream, and then top. Put in freezer for a couple hours (I left mine for about two and the ice cream was firm, but still soft and smooth. It was the exact perfect amount of time, so that's what I recommend. 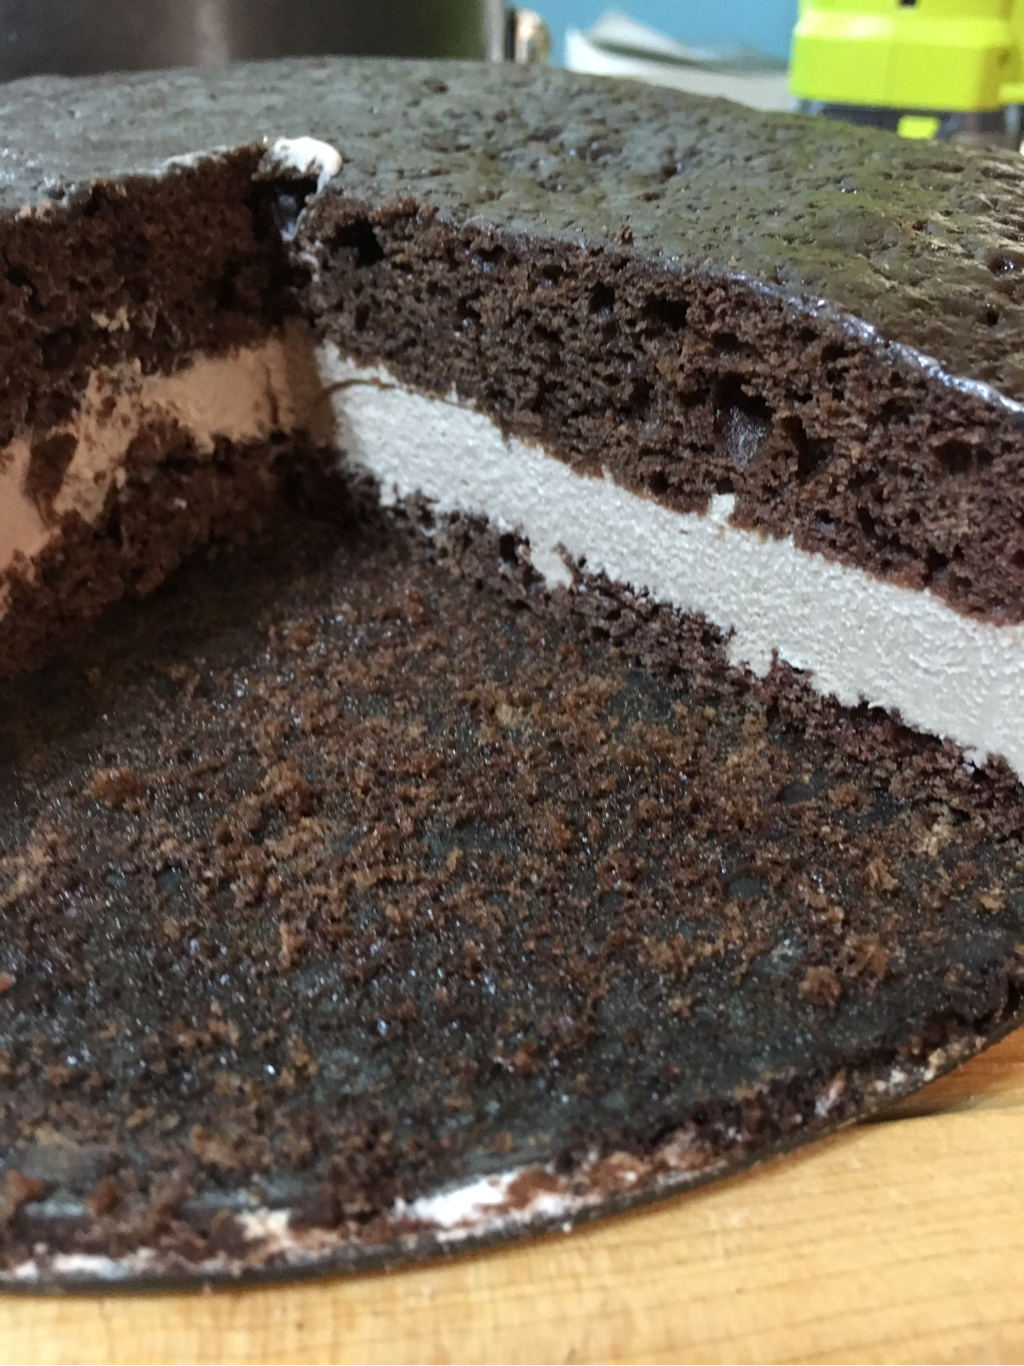
Look at that! No drips, moist and creamy and sorry if those words gross you out.
My husband is not generally a coconut fan, but loved it. I drizzled our slices with coffee liquor for a tiramisu-like flavor and left the kids' plain. I didn't think it needed frosting at all. It was just right the way it was. When Good Food Goes Bad, but That's Good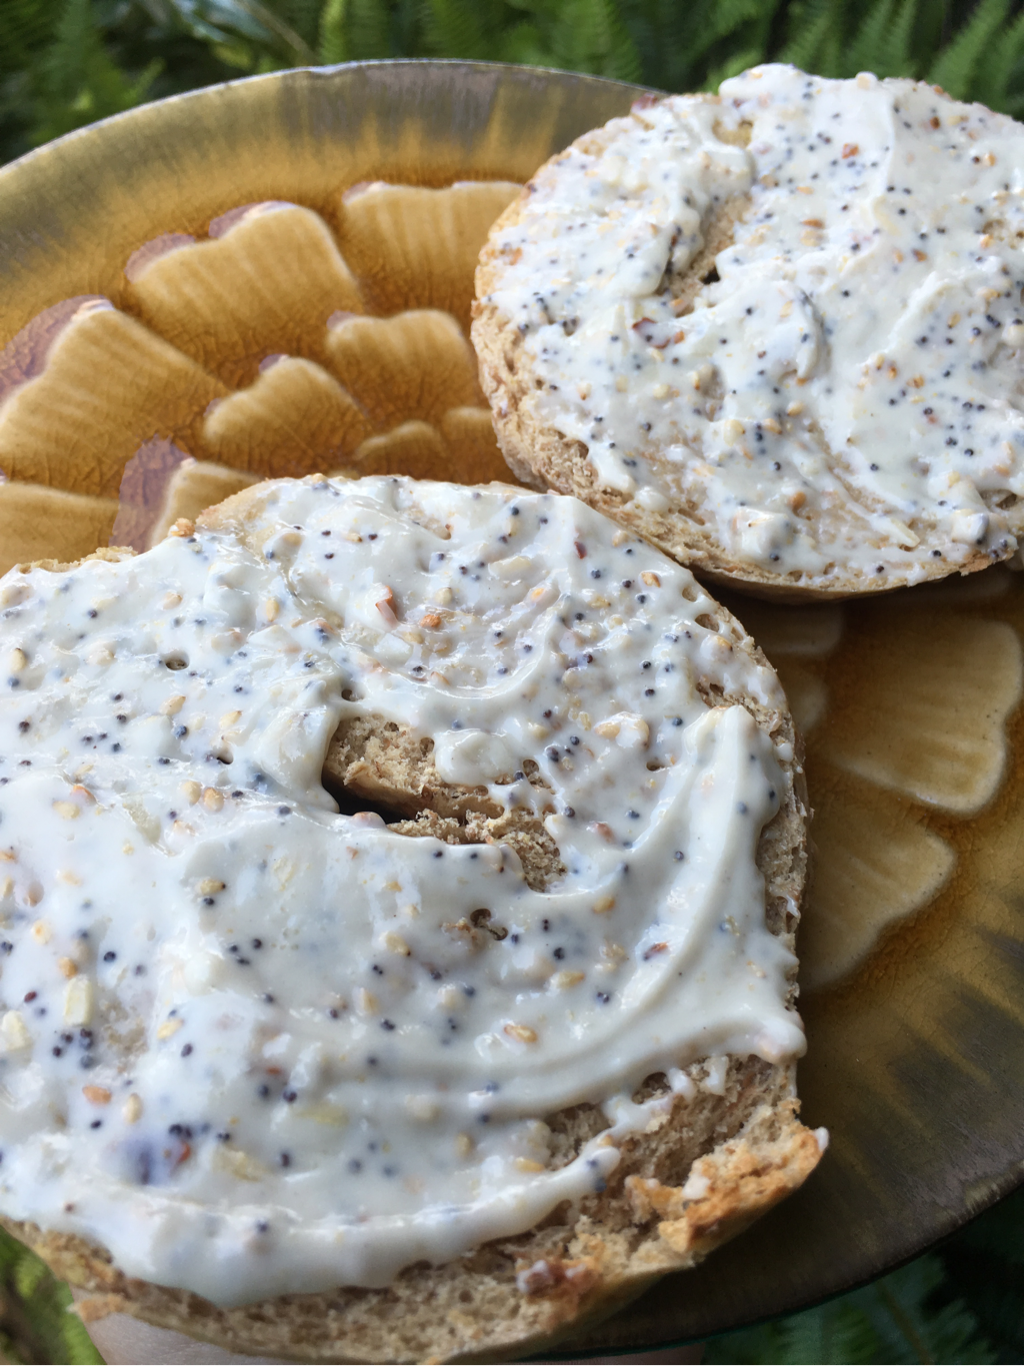 Maybe you, like me, are terrified of food spoilage and when I tell you how I make my fermented items you are going to scream and run for the hills. I totally understand, that was me until I got into it, and I still get freaked out from time to time and throw out a whole batch of something because it scares me. Fermentation is a traditional and time-honored method of preservation, but it also means intentionally leaving your food out to "age." Because I'm no expert, in fact, quite the novice, IMO, I strongly suggest you read up on it if you haven't tried it before and feel free to buy substitutes if you don't want to do home fermentation. If you are on Facebook, the group Wild Fermentation is a wealth of very skilled and experienced fermenters who can answer questions and give you suggestions on how to get your fermented goodies just right. Fermentation is a metabolic process that converts sugar to acids, gases or alcohol. It occurs in yeast and bacteria. via Wikipedia There are many things that are fermented that you probably already love like wine, vinegar, kombucha, yogurt, cheese (many vegan cheeses are made with fermented nuts milks/purees), sauerkraut (while the shelf-stable sauerkraut that you get in jars or cans is made with vinegar brine, more and more stores offer wild fermented sauerkraut in the refrigerator section). and more! Want to just buy some? Here are some brands of cultured nut cheeses to try:
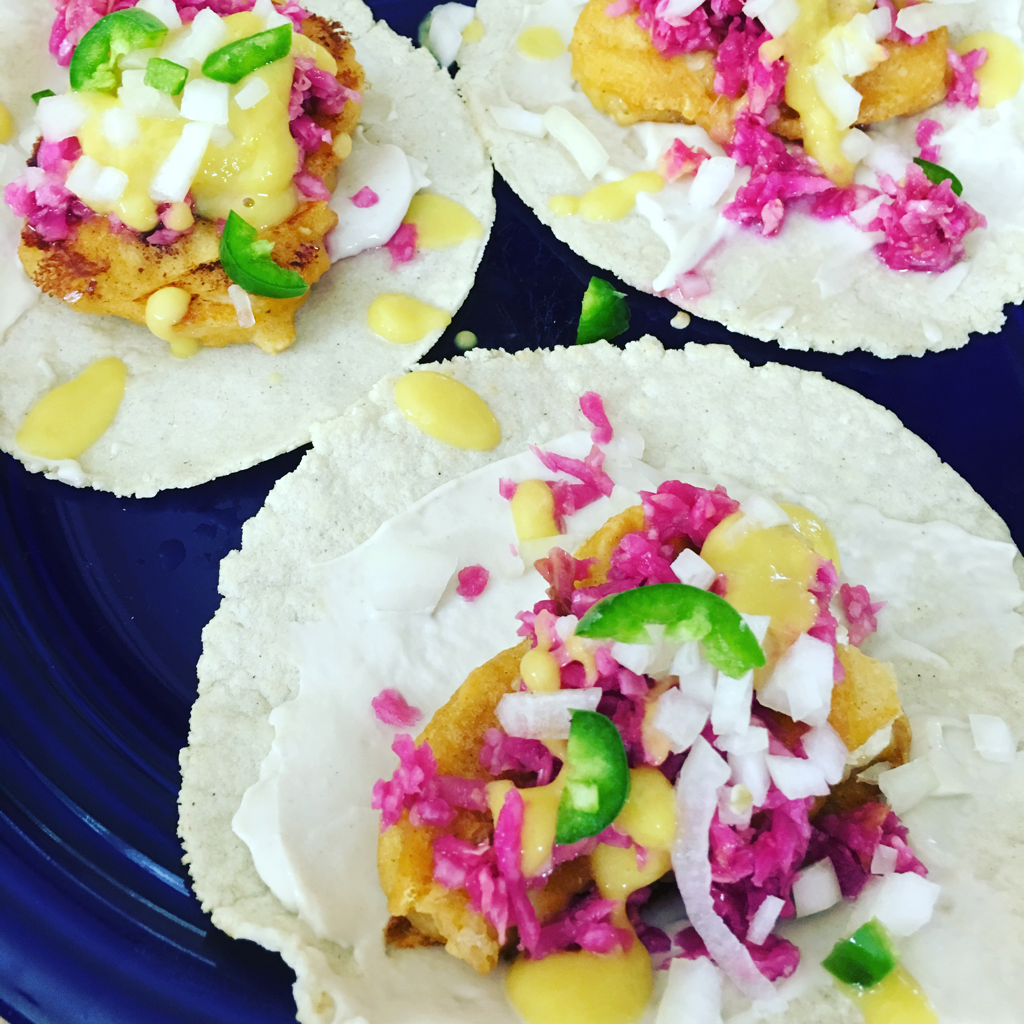 The creamy base of these tacos is cultured cashew cheese. Cultured Cashew CheeseI want to reiterate here: ferment at your own risk! I am not an expert and this is just how I have made it several times and enjoy it. For more tried and true recipes from someone who IS an expert, I recommend the book Vegan Artisan Cheese by Miyoko Schinner which has lots of info and recipes on how to culture your own cheeses. You can also order Miyoko's cultured cheeses through her website or in some Whole Foods and health food stores (mostly in California). Okay, so if you are still reading, I love your adventurous spirit, let's do this! You'll need a high speed blender (or you can presoak your cashews overnight), a wide mouth mason jar with lid, and either a very thin kitchen napkin or paper towel. This needs to be made a couple days prior to eating. Recipe 1 cup raw cashews/cashew pieces (I like these in bulk for a good price) 1/2 cup water 1/4 cup unrefined coconut oil 1/2 tsp pink salt 1 tsp fermented cashew cheese (If you can get some, this will make for a really good starter, so if you order some from Miyokos or find some in the store, just save a bit to get the process going. It works without, but it sure helps. Some recipes call for using a probiotic capsule to start it, so you can try that instead. I've even used a little liquid from live sauerkraut as a starter and it worked well.) Blend all ingredients until silky smooth. Like this. It's actually really good right at this point for a mild cream cheese, but I like to get it a bit funky, so I top it with a piece of paper towel or thin kitchen towel and the ring for the lid and set in a darkish corner of my kitchen counter. In 12-24 hours, little bubbles become visible, and that means it's ready to transfer to the refrigerator. You can also go by taste, but make sure to use a clean spoon and no double dipping! You don't want to introduce your mouth bacteria or any from your hands into your mixture. When it's got a nice tangy flavor, it's ready to move to the refrigerator and put the flat part of the lid in place instead of the paper towel or it will dry out. It's best to leave it overnight to solidify (this is where the coconut oil does it's magic. It becomes thick and creamy like cream cheese and I like it in place of vegan mayo on veggie burgers, tacos, in sandwiches, or on toast topped with avocado. When it warms up, it will melt back into that thick oozy goodness like when you first poured it from the blender, so be aware it will be messy if you use a lot. I like a thin layer for a flavor punch. 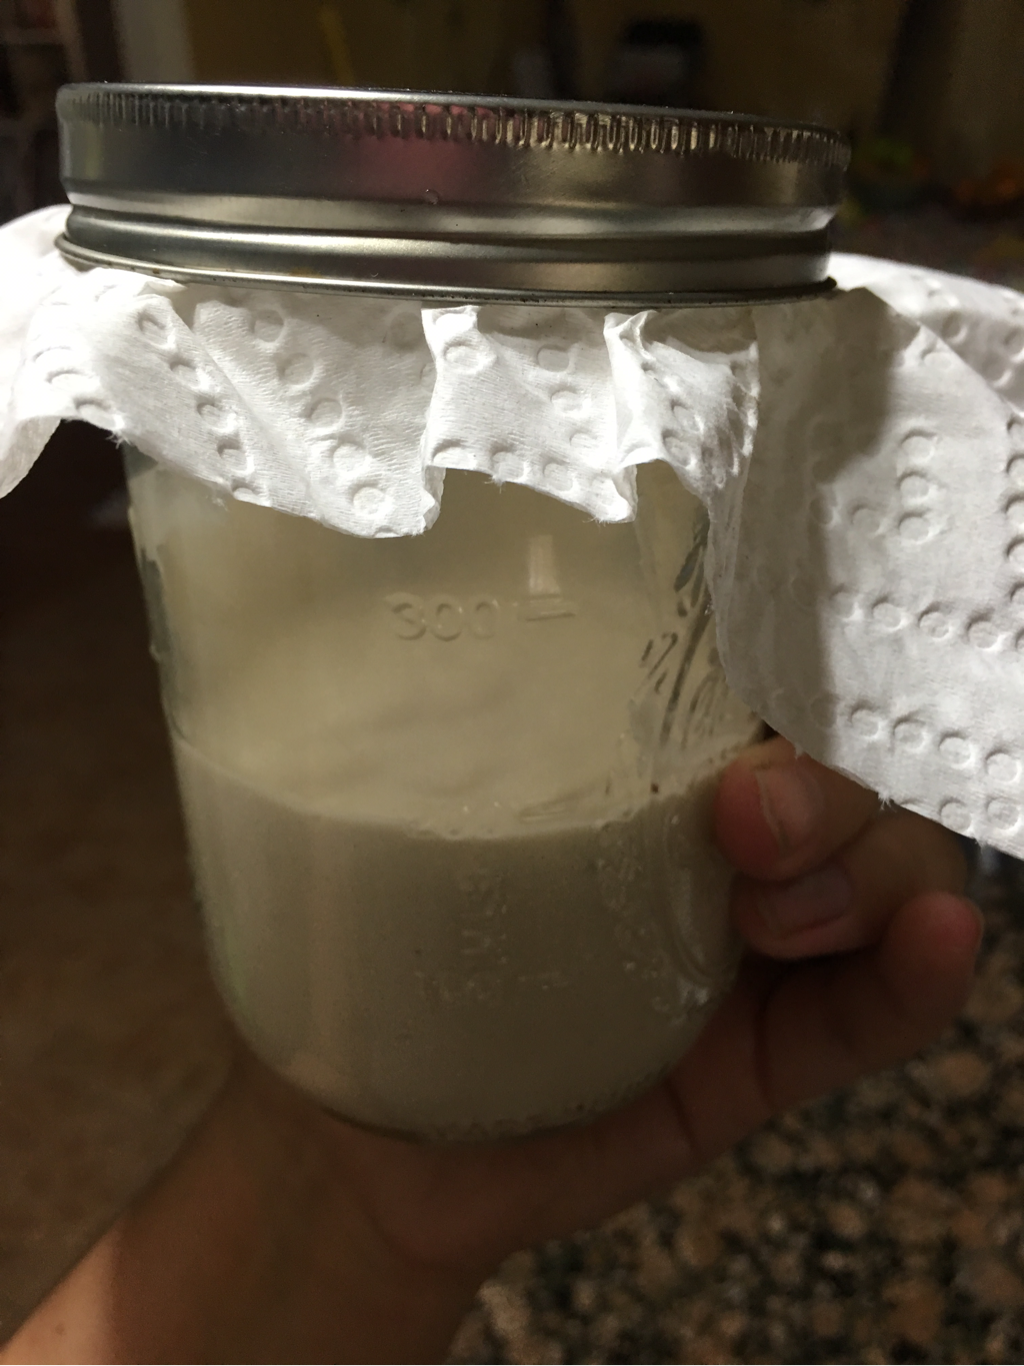 This is good to sit for a bit. 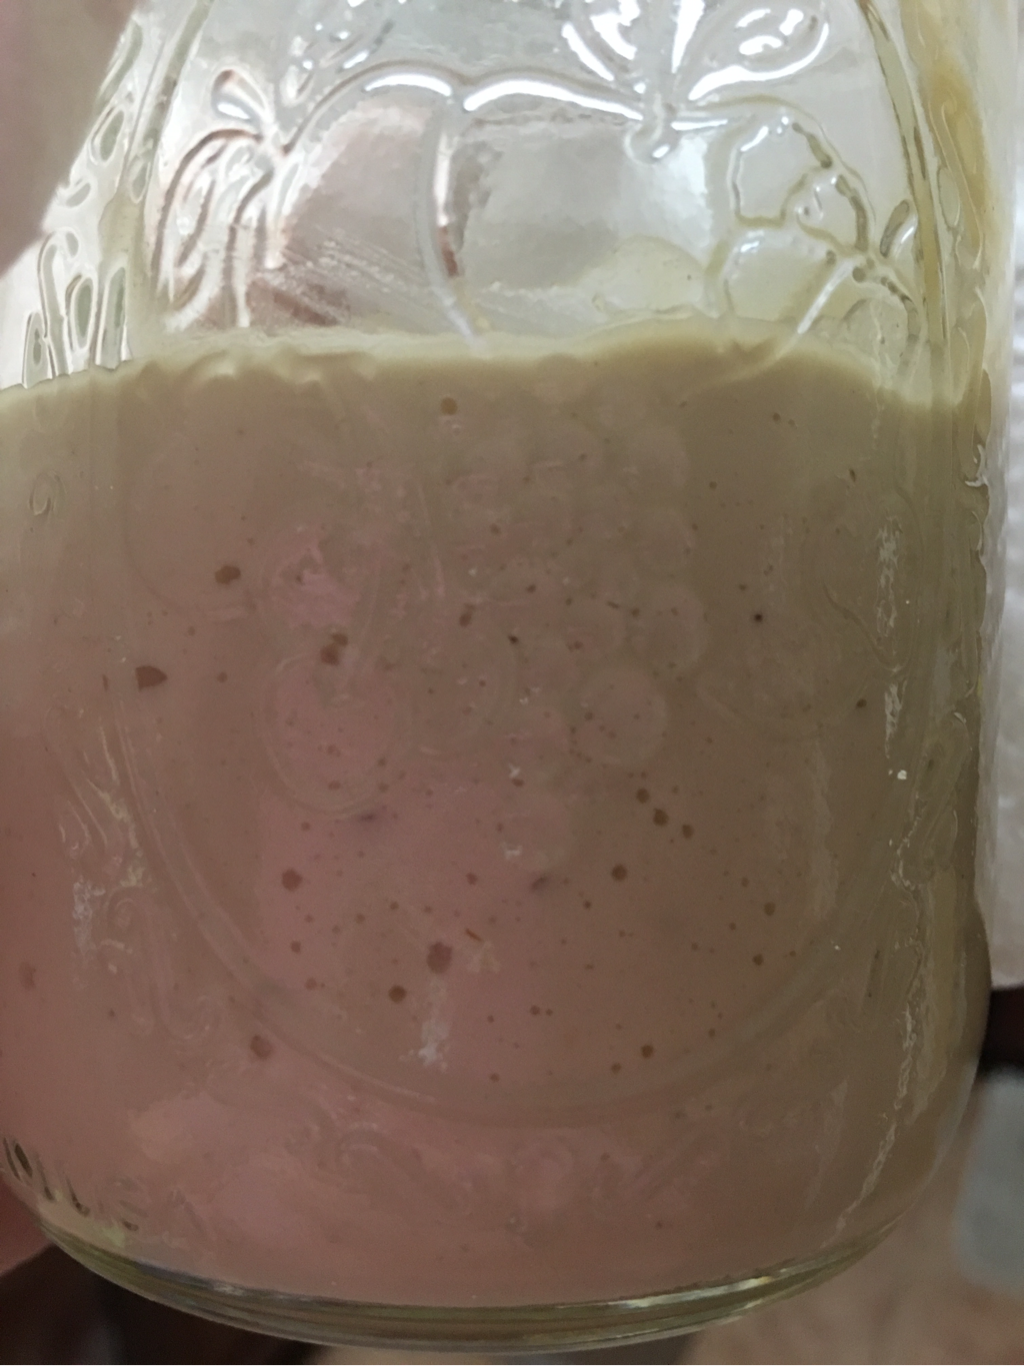 After 24 hours: perfect! Flavor add ins:
As always- have fun! Use your imagination and see how it turns out! |
I wrote a children's book, How Our Vegan Family Celebrates, to help vegans and vegan allies know how to include vegans in their celebrations and give affirmation to vegan kids who may feel alone. The book goes through holidays throughout the year and has a section at the back with parent tips!
Order your copy here today!  Follow me on Facebook and Instagram for even more tips, tricks, and fun!
See what I'm pinning on Pinterest! Check out my YouTube Channel!

AuthorI love cooking and playing in the kitchen with my toys, so let me share that joy with you and your family to bring the FUN back into the kitchen! Categories
All
|


 RSS Feed
